
How Can We Help?
WiseflowWiseflow
Guide to set up Wiseflow
This section shows how to enable and configure the Wiseflow integration to import student projects.
Enable Wiseflow integration
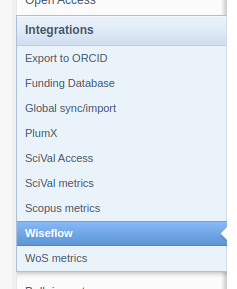
Navigate to the Wiseflow integration by going to Administrator → Integrations → Wiseflow:
Enable the integration:

Set up the integration to fit your needs:
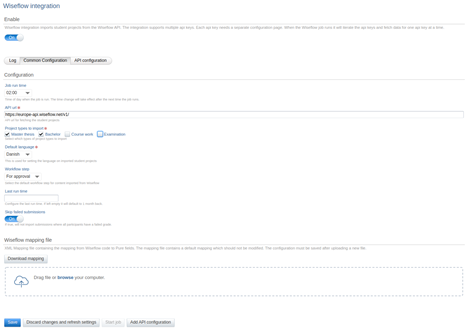
Things to consider setting up to suit your needs:
- Job run time - What time of day would you like the job to run
- Project types to import - Which types of student projects you want the job to import from the Wiseflow API
- Workflow step - Which workflow step would you like the imported content to be set to
- Skip failed submissions - Should the Wiseflow job skip submissions where no participants passed
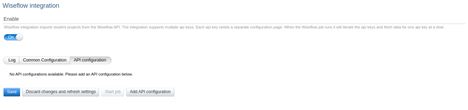
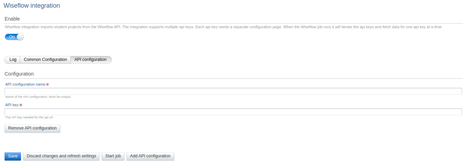
Add a new API key configuration:
Add your institution API key with a suitable name:
Finally, save the configuration. When saved, the job will run the following day on the configured time of day.
Guide to the mapping configuration
Since the Wiseflow data fields are mapping using an id, which Pure doesn't know before-hand, you can manually change the mapping Pure uses when converting the data from Wiseflow to Pure content.
This can be done by first setting up an API key configuration as described above. This will copy the default configuration and make a new configuration which is tied to the API key.
- Press the "Download mapping" to download the current Wiseflow configuration:

- Edit the Wiseflow configuration
-
Editing the Wiseflow configuration manually requires some knowledge of XML, but is pretty straightforward. Most configuration can be changed in the UI so that would be the recommended way of changing the configuration. However, changing the mapping cannot be done in the UI and therefor must be done directly in the XML configuration.
-
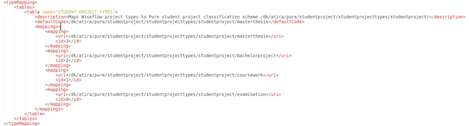
Type mapping
- Changing the type mapping can be done by changing the "<typeMapping>" tags in the XML.
- The "id" is a number from 0-3 which defines which type of student project to fetch from Wiseflow. They are currently mapped as the image above shows. If you'd like to change one of the types then just make sure to map to an existing Student Project type classification.
-
Type mapping
-
-
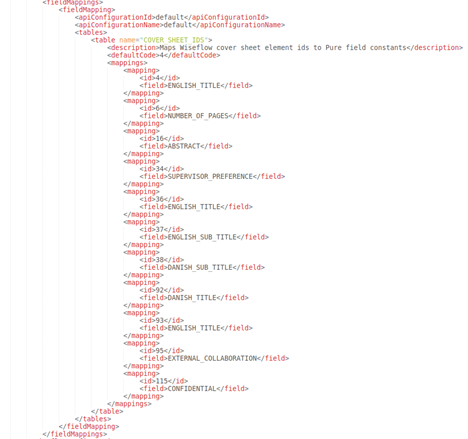
Field mapping
- The Wiseflow configuration contains a list of fieldMappings. One of these has an apiConfigurationName of "default". This is the "template" configuration that is copied when creating a new API configuration in the UI. This configuration CAN be changed, but be careful not to delete it when manually editing the configuration. Always first add a new API configuration in the UI and then when modifying the mapping, make sure to find the correct fieldMapping with an apiConfigurationName that matches the name of the API configuration that you'd like to change.
-
Field mapping
-
-
- The field mapping maps Wiseflow field ids to a constant which is then used by the Wiseflow job to map from the constant to the Pure field. Since the cover sheet ids can be API key specific (and therefore not necessarily known beforehand) you can change which field id to use to get, f.ex. English Title, from. In the default mapping there are 3 different ids used (4, 36 and 93) for the English Title. With this configuration the Wiseflow job will iterate through all 3 until a value is found.
- Should you need to change the id to find the English Title, then all you'd need to do is to find (or add) the ENGLISH_TITLE field in the XML and update the id to the correct one and upload the configuration file again. Then the subsequent run of the Wiseflow job will use the new id to find the English Title.
- You can find the list of currently support fields in the buttom of this page. The list corresponds to the default mapping in the Wiseflow integration. Also, attached to this page is the complete Wiseflow configuration XML file.
-
- Upload the edited API configuration again. Note that this will overwrite the entire current Wiseflow configuration when the configuration. The changes take effect when the configuration is saved after upload.

Published at November 10, 2023