
How Can We Help?
Pure maintenance mode (Installation)Pure maintenance mode (Installation)
Prerequisites
Pure needs to be able to access the internet for this part to work, as it will read some of the customer specific configuration from the Atira wiki.
Pure maintenance mode
As this is the first time Pure is started, it will enter maintenance mode to run the required installation jobs. The following will be shown in the log file when Pure enters maintenance mode
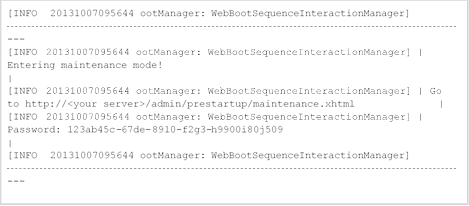
Now open the URL http://<your server>/admin/prestartup/maintenance.xhtml in a browser and use the password from the log file to login.
This password is auto generated every time Pure starts.

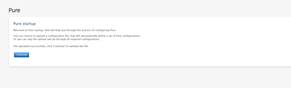
Configuration File upload
In the Pure startup step you will be prompted to upload the configuration zip file which has been provided by Elsevier or one of your colleagues.
Once the file has been uploaded, press continue to verify and continue
Any settings not defined in the configuration file will need to be entered manually see below (General configuration)
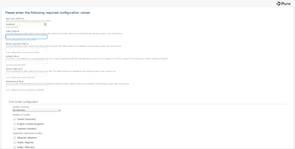
General configuration
Then we need to setup the general configuration of Pure.
All the values can be changed inside Pure after the installation (except System UI locales and Supported submission locales).
Mail host
Pure needs to be able to send out emails to users, so first we need to configure a SMTP server.
If the server needs extra configuration like TLS, username/ password, etc. it can be configured when the installation is done.
See the Pure Email page for more information.
Index folder
![]()
This is the folder where Pure will store it's server index.
If you used the folders suggested during the installation, this should be set to /data/pure_data
/search_indexfor Linux or d:\pack\pure_data\search_indexfor Windows.
Binary storage folder
![]()
This is the folder where Pure will store all binary files that are uploaded to Pure.
If you used the folders suggested during the installation, this should be set to /data/pure_data/perm for Linux or d:\pack\pure_data\perm for Windows.
This folder should be included in your backup.
Default URL
![]()
This is the default URL used to access Pure. This is used by Pure to generate some of the links used inside Pure.
If you do not have a URL for Pure yet, you can use http://localhost or http://<server name>
Server data dir
![]()
This is the folder where Pure will store the audit entries and different runtime files.
If you used the folders suggested during the installation, this should be set to /data/pure_data for Linux or d:\pack\pure_data for Windows.
A sub folder will be created for the audit entries called Audit, and this folder should be included in your backup.
Maintenance file
![]()
This is a file that can be used to give downtime information to users, and it can be updated from inside Pure.
It requires that you have a proxy server in front of Tomcat that can serve the file when Tomcat is not running.
If you used the folders suggested during the installation, this should be set to /data/pure_data
/maintenance.html for Linux or d:\pack\pure_data\maintenance.html for Windows.
System currency
![]()
The currency that should be used in Pure.
System UI locales

The UI locales that should be available in Pure.
![]()
Supported submission locales
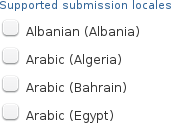
The submission locales that should be supported in Pure.
![]()
Continue
Now press the Continue button at the bottom of the page to continue the installation.
Database migration jobs
The next page is a list of database migration jobs that will be run to create all the database tables and initial data needed by Pure.
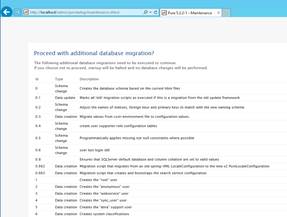
Scroll to the bottom
and press the Yes, proceed button,and Pure will run the listed jobs.
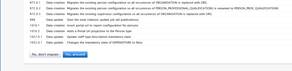
Additional database migration jobs
After the jobs have run, a list of additional jobs will be shown.
These are jobs that require some parts of Pure to be running, like creating initial users.
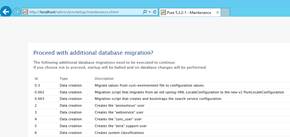
Scroll to the bottom

and press the Yes, proceed button,and Pure will run the listed jobs.
Database differences
This step will only be shown if there are any differences in the database compared to what we expect.
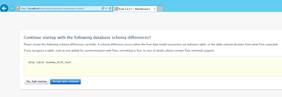
The most likely reason for this is if you have created your own (non Pure) tables in the Pure database.If this is the case, you should just press Accept and continue.
In most other cases you can just copy the SQL listed here and run it to get the schema in sync, but if you are in any doubt about what the differences mean, you should contact Pure support.
In most cases you will be able to just copy the SQL and then run it after the installation is done.
Pure login
When the jobs are done you should see the Pure login screen
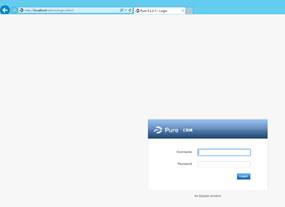
You can login with one of the users that has been provided by the Elsevier Implementation Managers. Pure is now ready for use.
Published at January 04, 2024